Painting Techniques: Achieve a Professional Look
Ever stared enviously at a beautifully painted wall and wondered how on earth they achieved such perfection? 🤔 Well, you’re not alone! Whether you’re a DIY enthusiast or a budding artist, mastering professional painting techniques can transform your projects from drab to fab. Let’s dive into the world of painting and unlock the secrets to a flawless finish!
Table of Contents
1. Introduction
2. Preparing Your Surface
3. Choosing the Right Tools
4. Mastering Brush Techniques
5. Perfecting Roller Techniques
6. Experimenting with Special Effects
7. Conclusion
8. FAQs
Preparing Your Surface
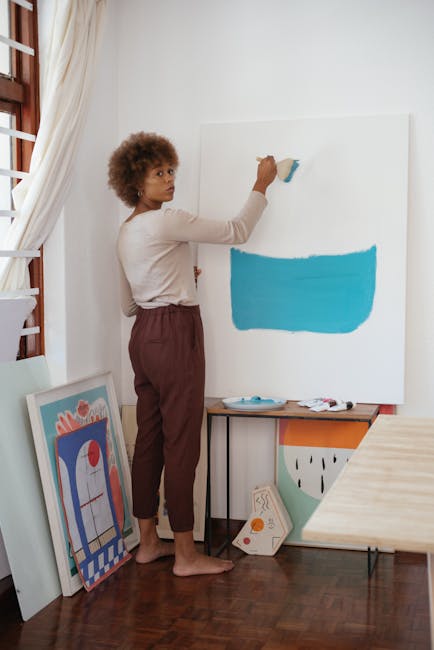
The first step to achieving a professional painting look starts with preparation. Think of your surface as a canvas; the smoother it is, the better your painting will look. 🖌️
Start by cleaning your surface thoroughly. Remove any dust, grease, or old paint flakes. Sanding is your best friend here—smooth out any imperfections to create a flawless foundation. Don’t forget to apply a primer, which helps the paint adhere better and ensures a more vibrant finish.
Choosing the Right Tools
Walking into a paint store can be overwhelming with the plethora of brushes, rollers, and sprayers on offer. Here’s a quick guide to help you make the best choice:
Brushes: Ideal for small areas, edges, and corners. A high-quality brush can make all the difference. Look for brushes with natural bristles for oil-based paints and synthetic bristles for water-based paints.
Rollers: Perfect for covering large surfaces quickly. Choose the nap (thickness of the roller) based on your surface texture—short nap for smooth surfaces, longer nap for rougher ones.
Sprayers: Best for large, flat surfaces and for achieving a super-smooth finish. They require a bit of practice but can be incredibly efficient.
Mastering Brush Techniques
Using a brush might seem straightforward, but there’s an art to it! Here are some tips to elevate your brushwork:
– Use light, even strokes. Avoid overloading the brush to prevent drips.
– Maintain a wet edge to avoid lap marks.
– For straight lines, use painter’s tape as a guide and remove it before the paint dries completely to avoid peeling.
Perfecting Roller Techniques
Rollers can cover large areas quickly, but achieving a uniform look takes a bit of skill. Here’s how to get it right:
– Use a W or M pattern to distribute the paint evenly, then fill in the gaps.
– Apply consistent pressure to avoid roller marks.
– Work in small sections to keep a wet edge, ensuring seamless blending.
Experimenting with Special Effects
Feeling adventurous? Special effects can add a unique touch to your painting projects. Here are some ideas to inspire you:
Sponging: Use a natural sponge to dab paint onto the surface for a textured look.
Rag Rolling: Roll a rag through wet paint for a soft, marbled effect.
Stenciling: Use stencils to create patterns or motifs, adding a personalized touch to your walls.
Conclusion
Painting is more than just a chore; it’s an art form that can transform any space into a masterpiece. 🎨 By preparing your surface, choosing the right tools, and mastering various techniques, you can achieve a professional look that will impress even the toughest critics. Happy painting!
FAQs
Q: How do I avoid brush marks when painting?
A: Use high-quality brushes and apply the paint with light, even strokes. Keeping a wet edge and not overloading your brush can also help reduce brush marks.
Q: What type of roller should I use for textured walls?
A: For textured walls, use a roller with a longer nap to ensure the paint reaches all the nooks and crannies.
Q: How can I achieve a smooth finish with a paint sprayer?
A: Practice makes perfect! Keep the sprayer moving in smooth, even strokes and maintain a consistent distance from the surface. Test on a spare piece of wood first to get the hang of it.
Q: Is it necessary to use a primer every time?
A: While not always necessary, using a primer is recommended for new surfaces, drastic color changes, or when covering stains, as it helps the paint adhere better and improves the overall finish.
Q: Can I paint over old paint without sanding?
A: While you can paint over old paint, sanding is recommended to smooth out imperfections and create a better surface for the new paint to adhere to.
Top 10 Must-Read Personal Development Books of 2025 In the fast-paced world of 2025, personal development remains a crucial facet Read more

How to Troubleshoot and Speed Up a Slow PC In today's digital age, a slow PC can be a significant Read more
The Ultimate Guide to Free Video Editing Software for Aspiring YouTubers In today's digital age, video content is king. Whether Read more

Setting Up a Secure Wi-Fi Network: A Comprehensive Guide In today's digital age, securing your Wi-Fi network is not just Read more